I was presented with this very interesting challenge and I enjoyed the end result so I wanted to share my thought process and techniques.

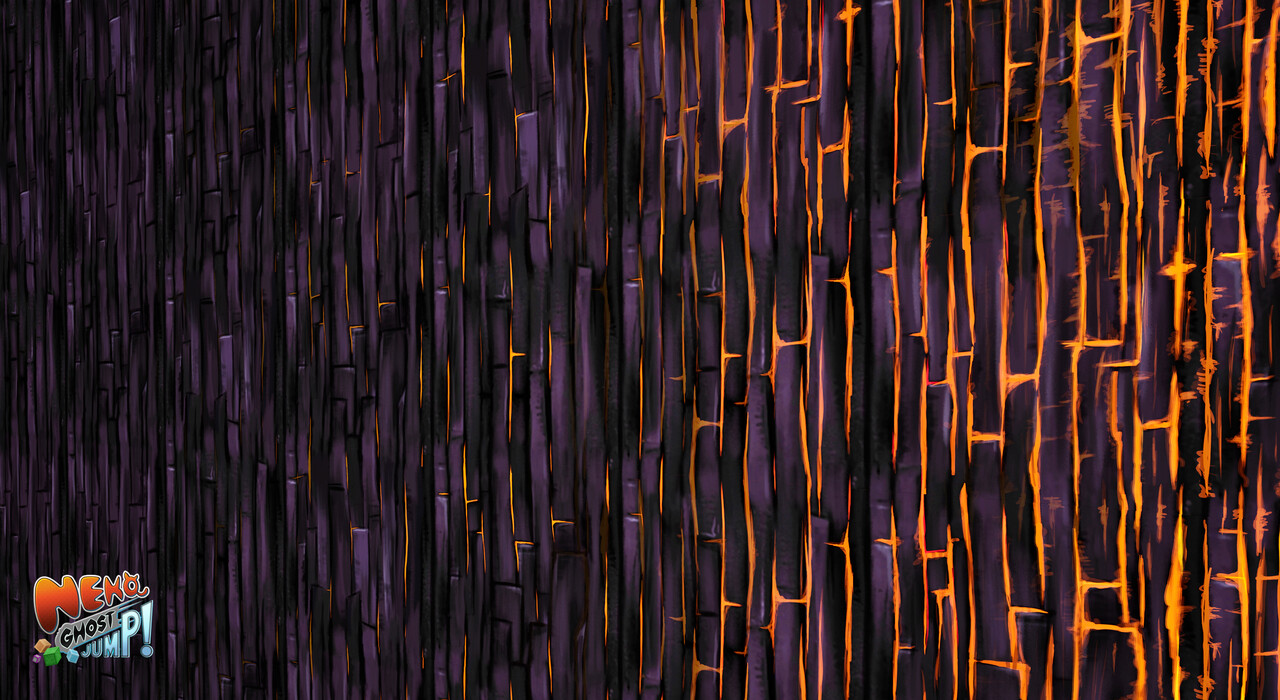
I was given this concept art and told to make it work on our pre-established square mesh. The tile needs to rotate seamlessly upon the x axis and all 4 sides need to be unique. It also needs to tile up and down the y axis, but does not have to rotate. This gives a stack of blocks the illusion of being seamless and non repetitive when stacked and rotated. It also needed to have a unique mask for three different temperature stages.
This concept, as you can see, only illustrates one side of a block and has a very obvious tile. So my first challenge was to figure out a way to make 4 unique sides that tile seamlessly into each other along the x axis.
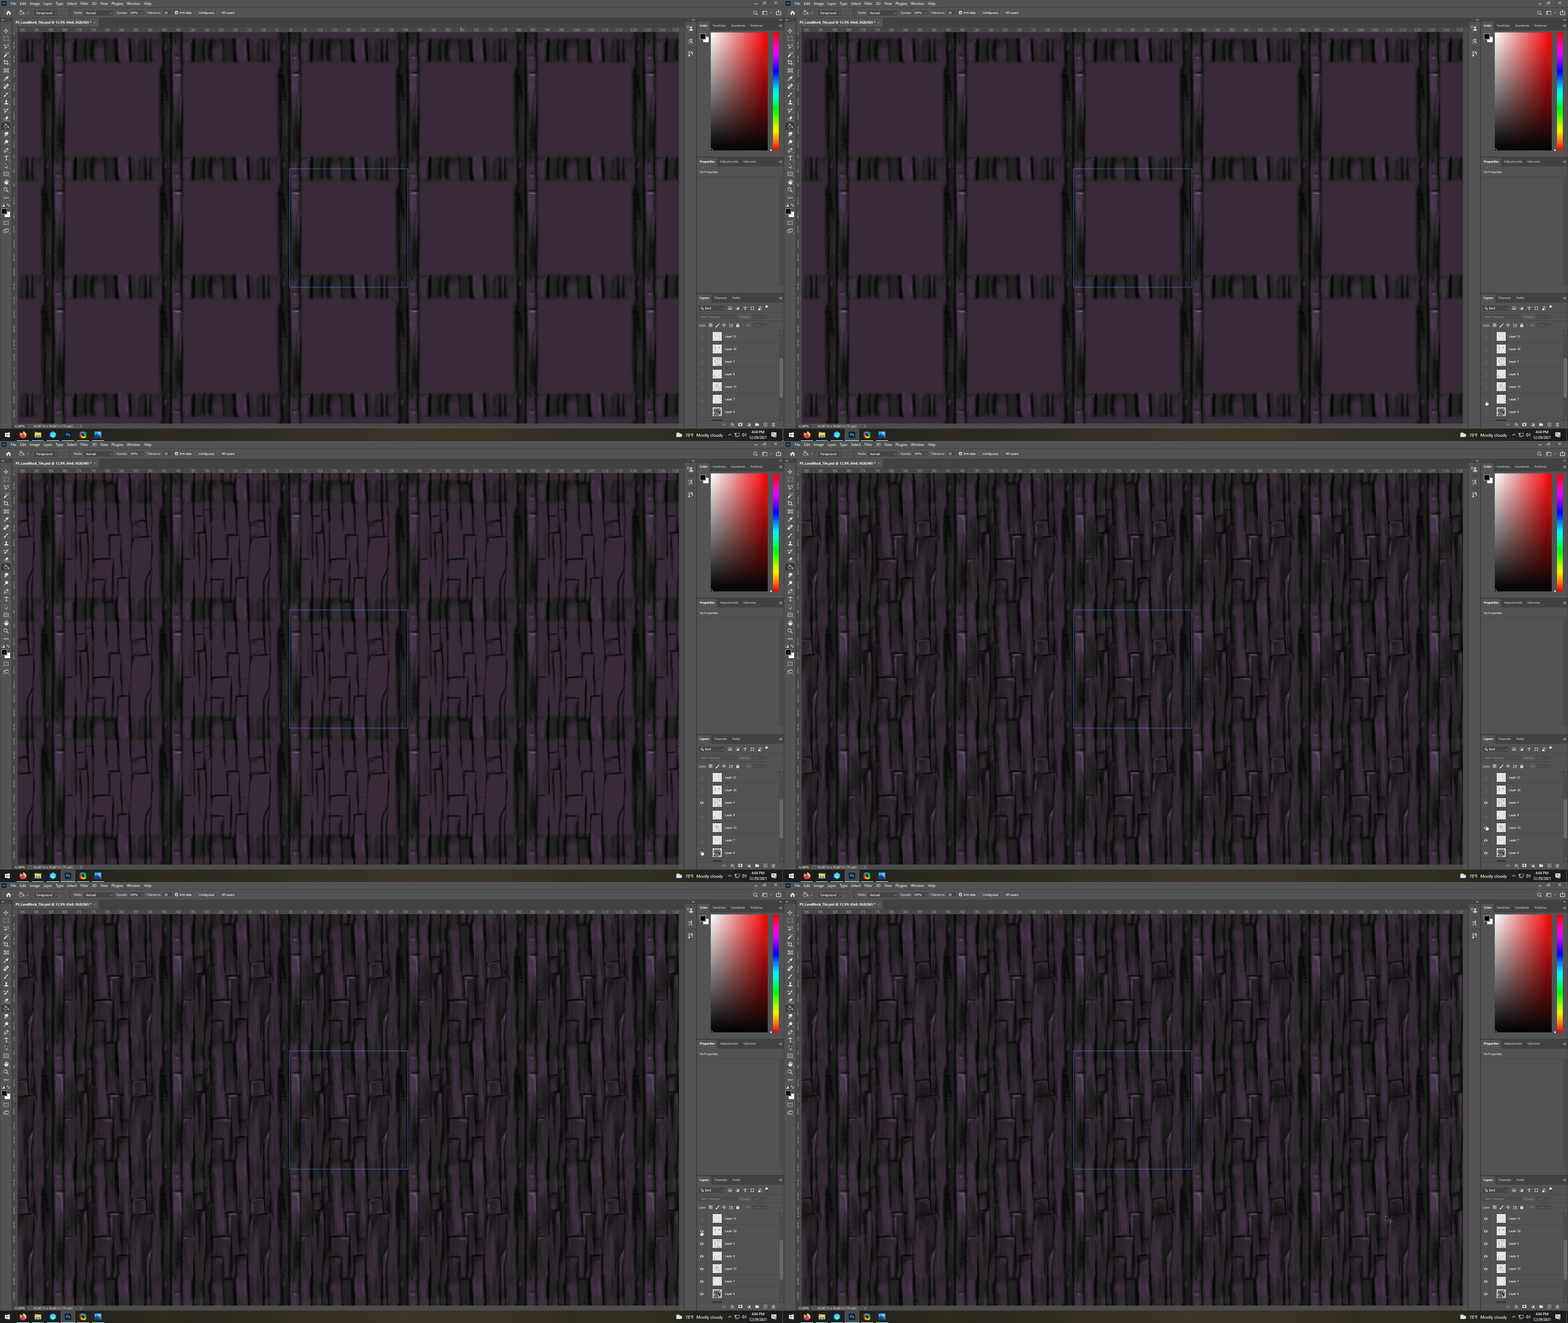
First, I did not want to spend time remaking something usable. The concept artist has spent a lot of time on the initial illustration and I really liked the look and feel of the texture. I contacted her and was able to acquire her custom brush pack used for creating this unique gritty feel. I then took this image and cropped out the top right basic texture. The image was set to 512x512, not nearly high enough detail to work with. I took the image to an upressing software and scaled it up to a 4k image. I then took the image into Photoshop where I used pattern preview and the clone stamp tool to remove the seams and touch up any imperfections.
I got it to a point where I was happy with moving on and then duplicated the folder. I then merged the folder together to get a flattened image of just the now seamless texture. Having worked on these tilling blocks before, I knew the best way to make unique sides was to make sure the edges did not change. This led me to an interesting solution.
I took the now tilling image and cut out a feathered square selection from the center. This gave me a blank middle with an undisturbed edge that I could now build a new texture inside of.

I repeated this process two more times resulting in 4 unique sides, similar enough to the original to not stand out when placed side by side.
I then had to take these textures and apply them to the uv for our block. I utilized guides to make sure each square snapped perfectly into place.
The top was its own unique challenge. This one had to rotate and tile with itself freely on the y and x axes. I struggled to find the perfect way to do this. After a few trials and errors I moved my process to substance painter. In Substance I set up the blocks in a tile and attempted to paint directly on the mesh using the uv projection and the brush set I acquired earlier. This was not easy and in the end I am not 100% happy with how it came out but I did end with a usable product. I plan to revisit this later and try again in Photoshop, utilizing its radial symmetry brushes. Only downside to that idea is you cannot currently use the pattern preview and radial at the same time, so I would have to switch back and forth to make sure the tile looks correct.
So now I had completed the base cold lava rock texture. That was Step 1. Step 2 was to start making a mask for each temperature level.
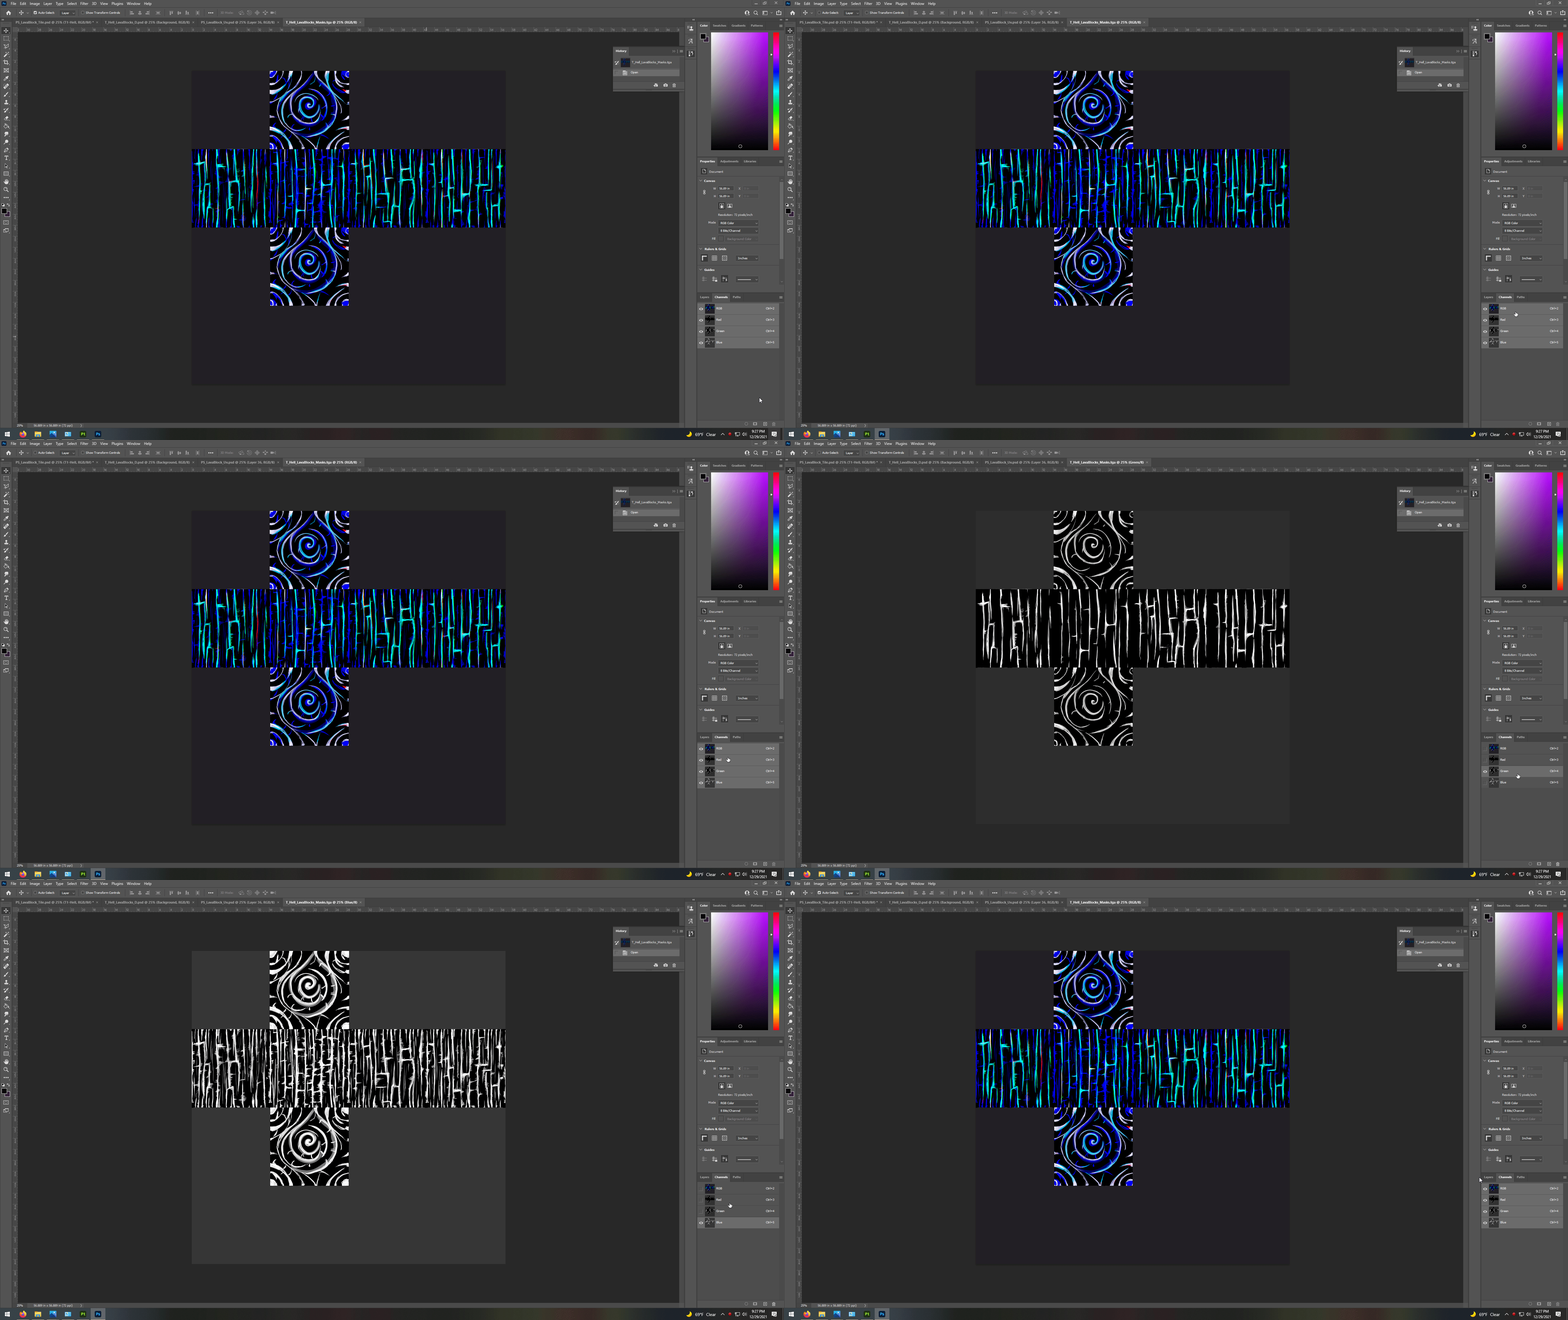
To do this I went back to Photoshop. I used the same method as before but this time painted a white mask over cracked areas. The trick here was to try and add enough detail without too much obvious tilling.
I did three variations that could then be layered on top of each other to create a detailed emissive map in the engine. I did not want to have three more texture files for each image so to save space I placed each mask in its own color channel on a single texture.

Once I imported these textures into UE4, I created some simple materials to showcase how the masks and texture could work.
Placed side by side they look like this.
All in all, it was a fun challenge that took some out of the box thinking and problem solving to accomplish.


